Hi there , to any and all of you who look at this blog , you may have noticed that I have been rather quiet of late . This is mainly due to being very unwell , which makes it very difficult for me to be creative.
By way of an apology to anyone who regularly checks this blog and particularly to those lovely people at Creative Expressions I have created a set of five large tags with a Winter theme which I will post over the next few days . I hope you enjoy them .
Five Winter Tags .
I have made these tags as a set , so the colours I have used all coordinate . In view of this I an going to explain the preparation for all the tags here and not repeat myself for the other tags . Also I'll give a list here of the items I used which are the same for all the tags so that I don't bore you by repeating them each time !
I've cut all these tags from greyboard . They are all similar sizes but I've made each top slightly different. Once cut out I painted each tag with two coats of white Gesso .
I then made all the backgrounds using a technique inspired by old fashioned sponging . I like this effect but if you are going to stamp on it it can be difficult because the surface will be slightly knobbly. So I add colour using wet wipes to create a similar effect that is smooth . Pick up a little colour onto a scrunched up wet wipe and dab it onto the surface randomly. Because the wipe is wet the colou can then be spread out creating lighter and darker patches .
I tend to start with the darkest colour and work towards the lightes. The blue-purple is a mix of Sea Turtle and Samba Pink. I also used Sea Turtle and Blue Boy . Keep dabbing and spreading the colours until you get a pleasing effect . Finally I added some Flushed Cheeks to add a warm glow .
Here are the finished backgrounds. The lighter ones are created using the same colours but much less paint . By adding different amounts of each colour you will create slightly different effects that all tone together.
Tag 1 Happy Reindeer .
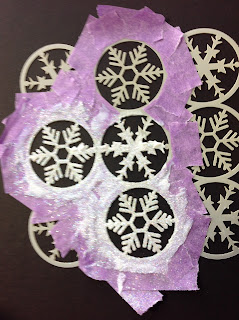
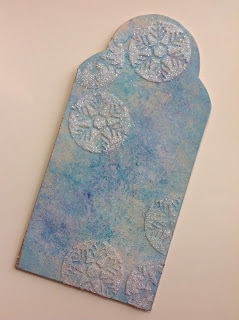
To create the first tag , once the paint is dry I added some texture by spreading clear Texture Paste through a stencil .
I masked part of the stencil so that I could just add some of the snowflakes and once I had spread the Paste through the stencil I pored glitter onto it so that the glitter would stick . The Paste is clear so all that will show is the glitter , but it will be raised .
I stamped the Snowflake ring onto the tag and around the glittered snowflakes (once dry ) with perfect medium and embossed the design with Persian Sea Aurora.
The large stars are from the Christmas Mega Grab Bag , painted with White Gesso. I then wiped Pearl Lustre Gilding Polish over them and let it dry .
I mixed three different gilding polishes together to get the colour I wanted and kept it in a sealed pot so I could used on the other tags ( Pearl Lustre, Silver Hessian and Gold Treasure ) . I used this to add colour to the tips of the stars . I then used glue to adhere glitter to the stars and to some flat backed pearls for the centre of the stars .
I used the same method to colour the Reindeer before stamping and Embossing the starry circle onto the Reindeer.
To finish the tag I stuck some lace from my stash at the bottom to suggest snow before adhering the stars and Reindeer to the tag ..
Creative Expressions products used to create the backgrounds:-
Cosmic Shimmer Gesso White.
Cosmic Shimmer Acrylic Mixed Media Paint , Flushed Cheeks, Sea Turtle, Blue Boy and Samba Pink.
Cosmic Shimmer Gilding Polish, Pearl Lustre, Silver Hessian and Gold Treasure.
Products used for this tag :-
Creative Expressions Clear Stamps , Winter Scene.
That Special Touch Mask, Snowflakes .
Cosmic Shimmer Texture Paste, Clear
MDF Reindeer Accessory Pack and MDF Christmas Mega Grab Bag .
Cosmic Shimmer Embossing Powder, Persian Sea Aurora.
Cosmic Shimmer Diamond Frost Glitter .
Creative Expressions Self Adhesive Pearls Cream 8mm.
If you would like to see what other members of the Creative Expressions DT are doing go to


No comments:
Post a Comment